I'm BACK! After a long case of blogger's block, I finally came up with a project to share with you!
I was inspired by a dress up set my daughter got for her birthday. There were fairy wings that came with the kit. She LOVES them, and keeps asking me to "go buy her more wings". She specified that she wanted purple.
Of course I didn't go buy any; I came up with a way to make them!
Supplies Needed:
(2) Wire coat hangers
Wire cutters
(1) pair knee high pantyhose
Masking tape (any kind of strong tape is fine)
Felt
Glue Gun
Spray paint
Steps to make Fantastic Fairy Wings:
- Bend coat hangers into "wing" shape
- Cut off the "hook" of the hanger. Right where the wire starts to twist.
- Using masking tape, tape off the wire ends really well. You don't want them to poke your little one!
- Take your knee high pantyhose, and stretch one over one of the wings:
- Wrap the excess panty hose around the wire (the part you taped in the previous step) Secure the extra pantyhose with tape. Should look like this:
- Repeat for the second wing.
- Since Miss J wanted purple wings, I used my favorite purple spray paint. Krylon's Gum Drop. SOOO cute!
- Give your wings a few LIGHT coats of paint. It won't take much.
- Tape together the middle sections of your wings:
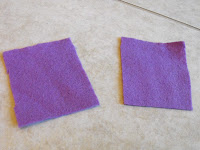
- Cut out two sections of felt, and hot glue one to the back of your middle section. Like so:
- Cut out 2 pieces of elastic. Measure around your child's arm to determine length. (I spray painted my elastic to match the wings)
- Hot glue the elastic to the felt in 4 places, like so:
- Take your second piece of felt, and glue it on top.
- Strap those wings on your princess, and you're ready to go!


Sarah, you're so clever it kills me! =) They're precious!
ReplyDeleteAdorable and easy too, I love it!
ReplyDeleteThese are AMAZING! Great job and you make it seem so easy! :)
ReplyDeleteI'll remember this come Renaissance Festival time...
ReplyDeleteHow cute! I always wondered how these were made. Thanks for the tutorial. I can't wait till my daughter is a little bigger to try it out!
ReplyDeleteLove it! I will never by another pair of wings again! Can't wait to try it!!!
ReplyDeleteI love how you used the nylons to make the wings. Very creative.
ReplyDelete~Makalani
Makaz Home
Very nice!!! Here's my best friends tutorial that she posted a few months ago- just to give everyone some more decorating ideas for the wings :) http://earthlyjoy.blogspot.com/2010/05/magical-fairy-wings.html
ReplyDeleteThese are adorable! And how creative to use the coat-hanger! You did SUCH a great job!! :)
ReplyDeleteThank you SO much for stopping by and your sweet comments, too!
This is an awesome project! I can see using this in a halloween costume in a few months. I am definitely p0utting these on my future project list.
ReplyDeleteThank you for participating in the Creative Therapy Session with Life in the Pitts!
Help. I need the adult version. I am thinking using more hangers and making each wing in two parts... what do you think?
ReplyDeleteWhat a clever idea! My daughter would love a pair herself - thanks so much for linking up to Be Inspired this month.
ReplyDeleteChelsea
This is a truly great way to recycle (or upcycle as I like to call it.) I love it and would love to see you post this at my linky party Upcycled Awesome!
ReplyDeletehttp://tinyurl.com/Upcycled9 and come back to my blog for Stashbusting-September. I promise it will be worth your while!
Thanks so much for the tute. I made some today for my 3 year old. Purple paint and ALL!
ReplyDeleteSarah-
ReplyDeleteI love this tutorial! I am going to feature it on Wednesday, 9/8. Thanks for the inspiration! So cute!!!
Thank you for adding pictures to your instructions - I looked for all day for a simple way to make a set of wings - the pictures helped me understand what I should be doing step by step
ReplyDeleteJ.S. Hanger Coat Hangers from Bizarkdeal
ReplyDeleteAre you hanging your expensive coats on freebie wire hangers that you get from the dry cleaner? Or are you trying to upgrade with the nicest thing they sell at Target? If you want top quality hangers for your top quality clothing, these are an excellent option. They are honestly the best in my closet, and they do a great job of holding heavier items such as my long wool winter coat and thick down jacket.
The hangers themselves are beautifully finished beechwood hangars. The arms of the hanger are rounded over the top, and the finish is completely smooth. Some lower quality wood hangars have rough spots or even exposed joints, but this hangar is smooth and finished well all around to avoid snagging on your nice clothes. The metal hanger on top swivels easily as well.
These are top quality hangers and certainly recommended.