Tuesday, December 18, 2012

2013 Primary Binder Printables

Pin It
The theme for Primary in 2013 is "I am a Child of God".


I created these printables for anyone that wants them!


Valiant 10/11 Boys

****UPDATE 12/19****
I've had some feedback that the above PDF files printed grainy.  Sorry about that!  I'm putting links below to HIGH RESOLUTION versions!

President Cover
1st Counselor
2nd Counselor
Secretary

CTR 4
CTR 5
CTR 6
CTR 7

Valiant 8
Valiant 9
Valiant 10/11 Boys
Valiant 10/11 Girls

BLANK Cover
Cover with year 2013

Hope these help some of you!  Happy Printing!

Saturday, September 15, 2012

{Modern} Baby Monogram Quilt-Part 2!

Pin It
If you remember this post, you saw the baby quilts I made for some friends!

I wanted to do a modern take on the traditional "baby quilt"


I been REALLY wanting to do a girlie version of this quilt.

Well, I finally got the chance!


I did a gray chevron fabric for the backing and border, and hot pink polka dots!


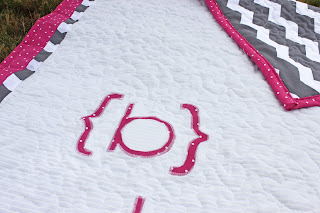
Here is a close up of the appliqued letters:


And the border:


It was so fun to make!


Click here for the full tutorial!  In the mean time, here are a few tips to get you started.


  • All the letters for the applique were hand cut.  I printed out the letters on paper, traced them on the fabric, and cut them out.  (My Cricut is packed away in a box somewhere!)
  • To quilt the top, I did free motion quilting.  This is my favorite way to quilt; it's fast, and you can do any pattern you want!  Check it out here
  • For the FULL TUTORIAL, click here

Linking up here!

Sunday, August 26, 2012

First Day of School Printables!

Pin It
My oldest, Miss J, is going to Kindergarten! 


I've seen all kinds of cute 1st day of school printables on Pinterest, and thought I would share with you some that I created myself!


I thought these turned out cute!  Click below to download!


If you would like to customize it yourself, I'm including a Word version of the file that you can download and customize!!


Links for Download:


Hope this helps some of you Mommas sending off your little ones!


Friday, June 22, 2012

{How To} A-Frame Tents!

Pin It
I've been pretty busy lately.....

These guys keep me on my toes!


I'm excited to share a fun and EASY project with you!

A-Frame Tents!


My kiddos have been making "secret hideouts" out of everything.  

They were driving me crazy!  

So, I whipped up a few A-Frame Tents.  They love it!


Every pirate needs a hideout!


 To see JUST how easy they are to make, head over to Cakies for the full tutorial!

They seriously took me, maybe, 30 minutes to make!

They have provided much more than 30 minutes of giggles, laughs, and pure fun!


Thursday, January 26, 2012

{XO} Valentine's Day Wreath

Pin It
I have the best project to share with you!  

In honor of V-day (which will be here soon!), I wanted to spruce up my front door.  

I was inspired by this wreath on Pinterest.  I loved it, but I did not love the $75 price tag! 


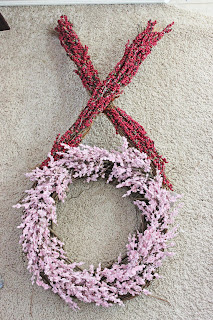
Here is my version:

Oh, and mine only cost $14 to make.  Sweet!


Supplies Needed

Glue Gun
Wreath (any size)
Vine Garland
Red Berry Stem (I used two)
Flowering pink stem (I used two)
Pipe Cleaners/Floral Wire


To make the "O"

I started out by cutting all the pink "flowers" off the stem, like so:


This leaves you with lots of little pink bushes


Add glue to the back, and press firmly onto your circular wreath.


Repeat this until you have completely covered your wreath.


Looking Good!!


To make the "X"

Start by uncoiling your vine garland.


Decide how long you want each side of the X.  
I cut mine to 24".

The garland kept wanting to curve, so I twisted and bent it a little until it laid flat.


Hold your two pieces together, and wire them together.  I couldn't find my floral wire, so I just used a pipe cleaner.


Cut your red berries in bunches from the stem, and then use your glue gun to attach them to the "X".


Press them firmly to the X.


After your X and O are finished, you need to wire them together.  I still couldn't find my floral wire, so I pulled the wire out of some wire-edged ribbon I had laying around.

This is a "figure it out" step.  Line up the X until it sits on the O the way you like it.  Then use your wire to attach it.


It should look like this when you are done wiring them together:


Hot glue on some white ribbon, and hang up your adorable new wreath!


Close up of the berries and flowers:


Happy V-Day!