Thursday, August 22, 2013

IKEA Bookcase HACK

Pin It
If you read regularly, you've seen some of the rooms in our new house.
(here, here and here)


Lately, I've been working on the upstairs living area. My *favorite* project, maybe ever, has been transforming our plain IKEA bookcases into something WAY more fun!


I started out with the plain old Besta bookcase from IKEA.

Now, I could have just styled the shelves and called it good, but I felt like it just needed something more!


I stumbled on this AMAZING company called O'verlays.  They are pros at helping you customize, and basically transform, anything IKEA!

They helped me design some custom Greek Key panels for my Besta units.  After I got them in the mail, it was DIY time!


I started out with plain white doors. 
(**bonus** the doors are only $5 at IKEA!  I love how cheap everything is there!)


I carefully taped the edges.  I only wanted the front of the doors gold.  The sides needed to stay white.


Then it was time to spray paint.  I knew I wanted to use my favorite gold spray paint for the background.  The O'verlays were going to stay crisp white.


I did a million small coats, being careful not to soak the doors in paint.


The result was a smooth, gold finish.  I was in love already!


To attach the O'verlays, I used a little bit of superglue.  The gel kind that doesn't run everywhere.


At this point, I couldn't believe how awesome they looked.  I was so excited to get them on the bookcases!

Here's a little "before" shot of the bookcases.  Looking a little sad....


Andddddd, after!


Love. Love. Love.


Close up:


Can you believe how a little spray paint and some O'verlays transformed these IKEA bookcases?  It's awesome.


Thanks for stopping by!

Tuesday, August 13, 2013

DIY Lucite Tray

Pin It
I love the look of Lucite trays! They are super classy, but run a little spendy for me.

I mean, it's just a plastic box.


So, I found some Pinterest inspiration, and crafted my own.

It turned out just like I hoped!


Supplies Needed

Clear Acrylic Frame
Scrapbook Paper
Painter's Tape
Spray Paint


How To

This honestly couldn't be easier!  SUCH a simple project.

Start out with a clear acrylic frame.  I got mine at Hobby Lobby (use a coupon!!).


Remove all the packaging and the backing.  You are left with a clear tray!
To dress it up a little, use a 12x12 piece of scrapbook paper.  I used a little tape to attach the paper to the bottom of the tray.


At this point, I was loving how it looked!


After a few days, I just felt like it was missing something.  Does anyone else obsess over stuff like this?  Oh, it's just me!

It just seemed too.....plain.


I decided to add some brassy accents.  Not too much.  That meant painters tape and spray paint!

Start by taping off your corners.  Decide how much paint you want on each edge.  I went for a rectangular look, you could do a square.


Flip over your tray and tape off the bottom.  You only want to spray paint your corners.


Next, pull out your favorite spray paint.  Mine is for sure this lovely brass color by Valspar.  I have used it on quite a few projects lately.


Give it 2 or 3 coats, with plenty of dry time in between.  Gently peel off your tape.


I started doing a happy dance here.  Lovely!!

Put your scrapbook paper back in the bottom, and you now have a *very* classy Lucite tray!


Love the dreamy corners!


Fits right in with our new upstairs living room!


Thursday, August 8, 2013

{Homemade} Laundry Detergent

Pin It
Let's talk laundry.  One of those absolute, must do, chores.  
Multiple times a week around here!


About 2 years ago, my mom started making her own laundry soap.  She finally convinced me to try some out; I loved it!

It smelled clean and fresh, and it was lacking all those gross chemicals found in the majority of detergents out there.

She helped me mix up a batch of detergent, and IT LASTED ME A WHOLE YEAR!

It cost me 8.77 for all the ingredients.  

And because it lasted me a whole year, 
It only cost me $8.77 to do a YEAR's worth of laundry!

I would say that's a significant savings.

Want to majorly cut back on the cost of detergent?  Read on, my friend.


Homemade
Laundry
Detergent


Ingredients

6 cups Borax
6 cups Washing Soda
1 Fels-Naptha bar
3 (three ounce) bars Ivory Soap, original


 Directions

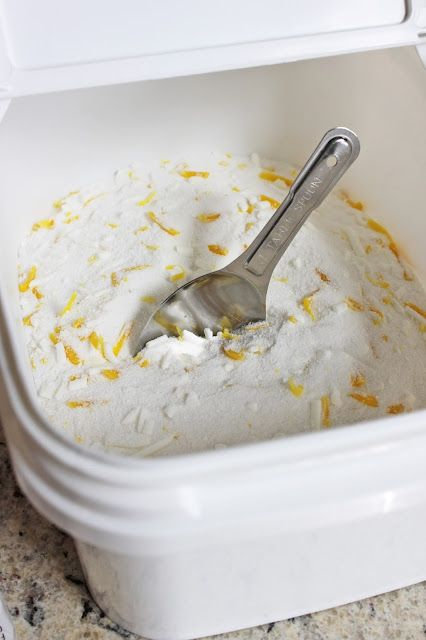
  • Get a large plastic bucket, and use this to mix it up and store it!

  • Grate the fels-naptha bar, and 3 Ivory soap bars with a cheese grater.


  • Measure Borax and Washing Soda into your bucket. 

  • Pour in grated soaps.

  • Mix thoroughly.


Done!


Usage

To use, simply add 1 Tablespoon to your laundry.  I have a front loading washer, and it works great!


Since we're talking about laundry, let me mention that I've also stopped using fabric softener.  I now use....


That's right!  I just use vinegar instead.  Contrary to what you are thinking right now, it does NOT make your clothes smell even remotely vinegar-y!  It gets them nice and clean, with no chemicals.  

I just add a dryer sheet to my clothes when I dry them, and it gives them a light clean smell.


The best part is it only costs $1.97 for a JUG of vinegar.  That is SO MUCH CHEAPER than buying fabric softener!  

To make it easier to pour, I use that little blue water bottle.  I use anywhere from 1/4 to 1/3 cup of vinegar for each load.

Now that you know all my secrets, make yourself some detergent!