


It's been a while since I posted! I've been so busy with school starting back up, soccer, and preparing for all the upcoming holidays.
In the middle of all that craziness, I've been working on something really fun. A full pantry re-do!
You'll have to wait until November 1st to see the full reveal-when I guest post over at GingerSnap Crafts.
For now, here is one of the many projects I tackled to get our horrid pantry in pristine condition.

As with my of DIY projects, this one started as a need to solve a problem-I needed a way to keep food off the floor (my pet peeve!)
The solution I finally came up with was wood crates that roll!
I didn't want our wood floors to get scratched up by them, so wheels were a must.
I ordered some wood crates from Home Depot. I know Michael's and Joann's carry them too sometimes.

At first, I thought I would stain all of them.

I loved this weathered gray stain. But staining was a total pain!
I'm a FAST DIY kind of girl.
So after one crate, and my feet looking like this:

I was DONE with staining. I had no idea it was so messy, or time consuming.

Out came my trusty spray paint for the other two.
After spray painting and staining were done, it was time for the easy part. Adding wheels!

I bought these wheels that roll AND swivel (fancy!) from Lowe's.

Each wheel took four screws. Save yourself some time and use a drill!

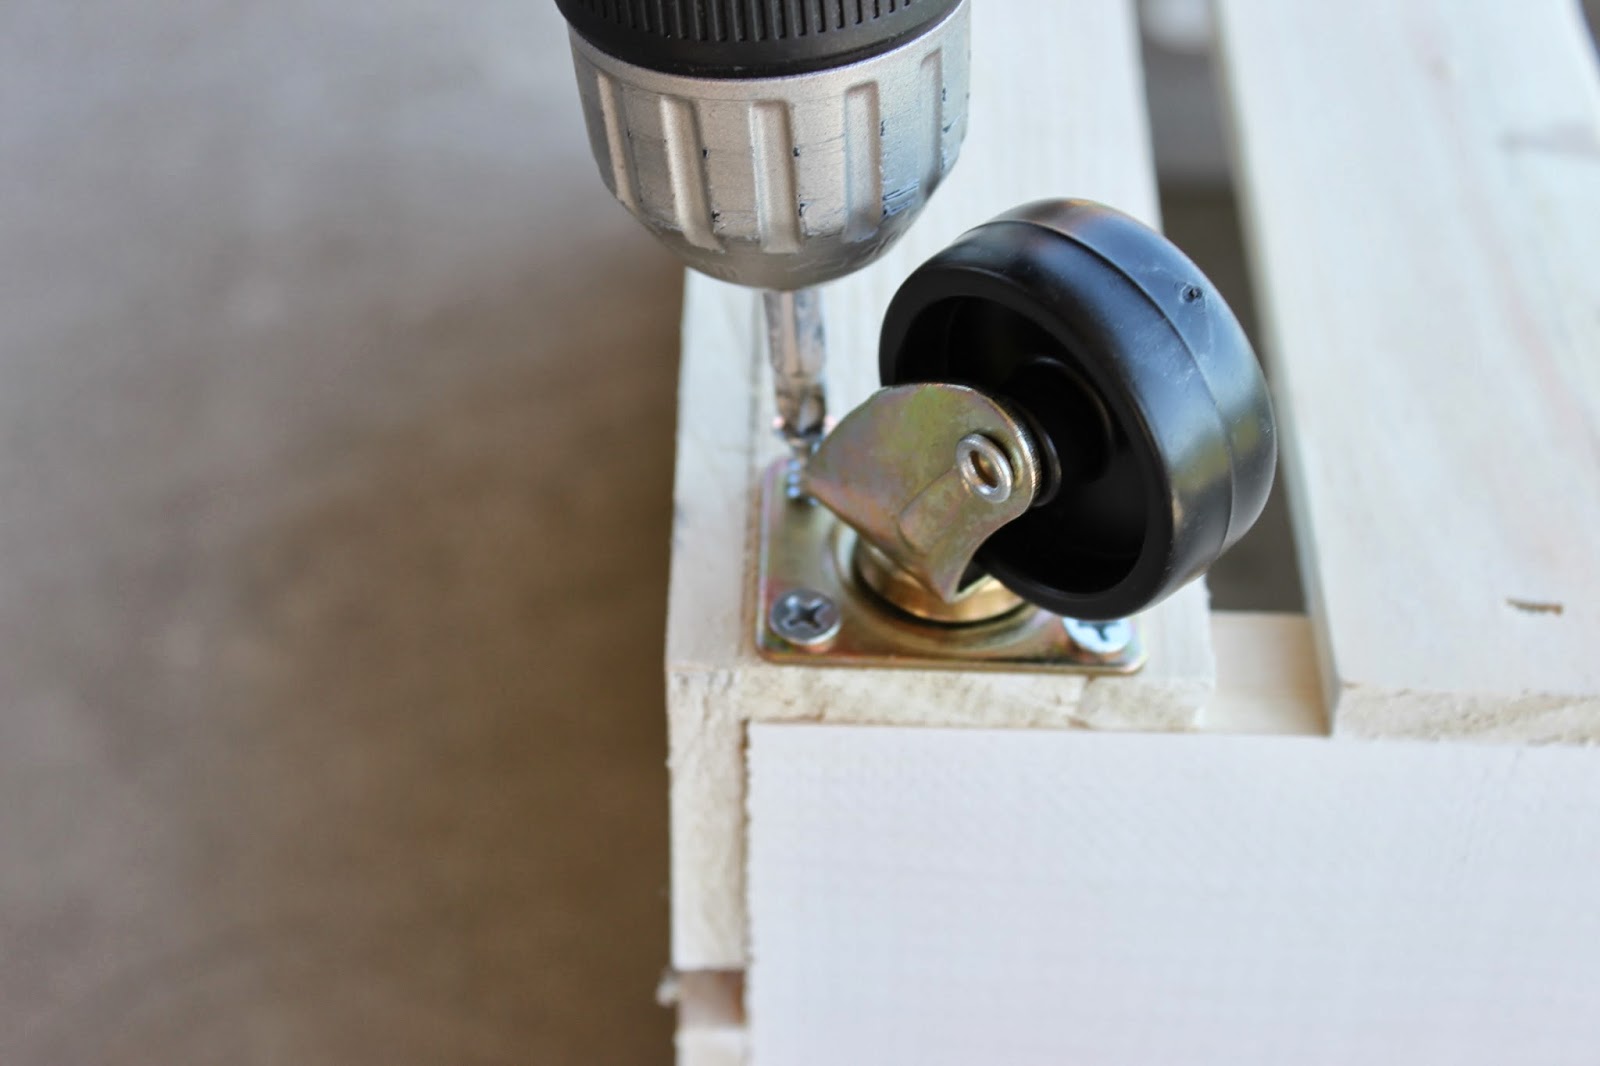
The wheels are cute, and make it so much easier to pull the crates in and out of the pantry!

Add a little vinyl, and done!


Love, love, LOVE!! I will be copycat-ing these immediately!! (Isn't spray paint the greatest?) Stopping by from the Truly Lovely linky. :) Megan @ C'mon Get Crafty
ReplyDeleteOh these are just perfect for storage! Love that you added the wheels!
ReplyDeletehttp://flyingfarandfree.blogspot.com/
those are really neat! now to come up w/ a place I could use em at my place!!??
ReplyDeletecoming at you from Funky Junk Interiors Linky Party!
What a great idea! I have gotten those crates before, but never thought to put wheels on them! Found you through Nifty Thrifty Things! I'm your newest follower :) Would love for you to come visit at www.cheeriosandlaundry.com! :)
ReplyDeleteLOVE LOVE LOVE!! I'm sorry if I missed it, but how did you apply the tasty, scrumptious, and yummy words? Did you mean they were adhesive vinyl? I love the font!
ReplyDeleteAmy, I just used a friend's Silhouette Cameo to cut out the vinyl, and then apply it. Hope that helps!
DeleteI am excited you linked up to Tickled Pink Times Two. I am sharing your DIY Rolling Wood Crates on my FB page today :)
ReplyDeleteWhat a neat way to organize things. I'll have to add this to my list of things to do!
ReplyDeleteGreat idea, especially it is rolling!!
ReplyDeleteThanks for sharing this diy at the party. I'll be tweeting & pinning your diy. I can't wait to make some! Theresa @DearCreatives
ReplyDeleteTheresa, Thanks so much!
DeleteThank you for sharing at our TGIF Link Party at A Peek Into My Paradise! Congratulations! Your post will be featured at the TGIF Link Party this week and will be pinned to the TGIF Party Board! I can't wait to see what you link up this week!
ReplyDeleteCathy @ http://apeekintomyparadise.blogspot.com/
Cathy, thanks so much for the feature!
DeleteLove this idea-i buy crates from an apple orchard down the road -already weathered stained-lol. But the crisp white crates look great holding food.
ReplyDeleteThanks for sharing
Sarah what size and font was used for the vinyl words?
ReplyDeleteHi there Sarah , I just put together a post of HOW TO DECORATE WITH CRATES and I used a picture of your gorgeous crate for inspiration with a blog link back to you provided. I hope that is ok, please advise if you want be to delete it. Greetings from Christine from Little Brags http://littlebrags.blogspot.com/2015/05/decorating-with-crates.html
ReplyDeletePOSITIVE Root Therapy is one of the best Hair Oil brand In market and have trust of , customers and provides services such as best onion hair oil , at the cheapest prices .
ReplyDeleteGet online astrology courses, Our astrology departments provide in-depth knowledge of all astrology areas specifically tailored to the needs of the client. Astrological lessons are made by the best astrologers and can help you master the art of astrology.
ReplyDeleteAe clicks is an award-winning social media marketing dubai, which is consistently ranked among the Top 10 Digital Marketing Companies in Dubai since last few years.Our team of experienced account managers and web specialists work closely with all our clients to develop a better understanding of their business and grow their business online, digital marketing goals, and corporate objectives.
ReplyDeleteerror 400 not found gmail
ReplyDeletehow to update norton internet security
how to connect canon mg3600 printer to wifi
gmail 400 bad request
how to connect canon mg3600 printer to wifi
norton security live update failed
Buying a home is very exciting and so is furnishing it. However, purchasing an assortment of furniture, accessories, and decorations for the home can also be rather expensive. This is not to mention the fact that finding the perfect displays can be very time-consuming. Painted wood crates are one solution to both time and money issues. They come in various dimensions and no matter what size or color, they are inexpensive. Los Angeles Pallets
ReplyDeleteExcellent information you have shared, thanks for taking the time to share with us such a great article. I really appreciate your work.
ReplyDeleteLoki TVA Variant Jacket
Hello sir good job I have like to read your post thank you for this stunning post. good growing. vaibhavee
ReplyDelete