Friday, May 14, 2010

Evolution of our Porch

Pin It
I love our big, covered porch.  
It's one of my favorite places to sit and watch my munchkins play.


However, the patio furniture we had was kind of....boring


No pizzazz!

I mean, it was the cheapest set they had at Wal Mart....


So, a makeover was in order!  My favorite kind of project!

I decided to go bold on this re-do.  I was going to use.......Orange!

Do you love this fabric or what?!  Awesomeness!

It's called oilcloth.  It's totally waterproof, and can be wiped clean.  Perfect for outdoor furniture.  

Here are some online resources that sell oilcloth:


This stuff is seriously AWESOME!  I've seen lots of ideas out there for oilcloth: baby bibs, diaper bags, placemats, table cloths, etc.

Anyway, using the old seat covers as a pattern, I made new covers for all the cushions, complete with white piping on the edges.
(I wish I could give step by step instructions, but it was a "figure it out as you go" project!)


Here's how it turned out:


Some close ups:


Here's my two side chairs:


I almost forgot to mention that I painted my chairs.  Primer first, then a few layers of textured black spray paint.


It turns out looking like this:


         Before:                                                       


     After:


Before: 


          After:


Before:


After:


Saturday, May 8, 2010

Antiquing a Mirror {all by yourself!}

Pin It


I love stuff that is worn and weathered. I think antique mirrors are so fun. They can be hard to find, and pricey.  I loooove these from Anthropologie:

So neat, right?  They are only $695.00.  Yes, you read that right!


I was inspired by these in Ballard Designs:
I love the jute around the edges, and the leather strap.  Would look great in my house.


Well, today I would loooove to show you how to make the Ballard Designs mirrors, with an antique twist. 


Supplies Needed:
Mirror{s} (my mirrors are 18")
Jute or Twine
Paint Stripper
Muriatic Acid
Vinyl tubing
Gorrilla Tape (or duck tape)
Black Paint (brush on or spray paint)
Neoprene Gloves
Face Mask
Glue Gun
Disc Hangers

WHERE to find your supplies:
  • Mirror{S}-most craft stores only sell mirrors up to 10".  I ordered mine online, and found a large selection for a low price.  (18" for $6.99 each)
  • Jute or Twine-can be found at any craft store
  • Paint Stripper-head to your local home improvement store
  • Muriatic Acid-this is actually a pool cleaning chemical, and can be found at any home improvement store in the pool section ($6 for a gallon).  Or if you know anyone with a pool or access to a high school chem lab, it could be free!
  • Vinyl Tubing-can be bought by the foot at your home improvement store.  It is in the plumbing section ($1.20 per foot)
  • Gloves/Face Mask-you WILL need these! ($4 for both @ Lowe's)
  • Glue Gun-you should already have one of these :)

 A precaution: Muriatic Acid is the same thing as hydrochloric acid.  It is perfectly safe to use if YOU are careful.  Never ever use this around children or pets.  Wear gloves, a mask, goggles, and shoes!  This stuff can dissolve rocks.  It is dangerous if not used properly!  BE CAUTIOUS!


FYI: A little about the anatomoy of a mirror.  It is glass (or plastic) with a reflective film, and then paint on top of that film to protect it from scratching.

Steps to an AWESOME antiqued mirror


    1.  Liberally apply paint stripper to the back of the mirror, and let it sit for 
         10 mins.  
    2.  Wipe off the paint stripper, and most of the paint should come off; rub
         or scrape hard if needed!


   3.  Wipe off mirror with a dry towel.
   4.  Fill a spray bottle with Muriatic acid, and lightly spray where you want the
        acid to EAT THROUGH the reflective coating.


    5.  Watch your mirror; the acid works fast.  Wipe off any excess acid as 
        soon as you get the results you want. (the blue arrows show the dark 
        spots where the acid ate through the reflective coating)


    6.  Scratch up your mirror some with something sharp.  I found that scratch 
         marks added a nice touch to the "acid burns"

    7.  Wipe the mirror down thoroughly with a wet towel.  This will prevent the
         acid from continuing to eat the reflective coating.

    8.  Allow the mirror to air dry for 10 mins or so. 

    9.  Spray paint or brush paint the back of your mirror black.

  10.  After the paint dries, enjoy your Antiqued Mirror!


Steps to a Ballard Designs {knock off} Frame!
    Measure vinyl tubing to fit around mirror (this will be your "frame")

    Tape ends together securely using Gorilla Tape


    Watch your munchkin run away with your project........


    Being wrapping "frame" with jute or twine.

    Hot glue jute/twine every so often for stability.


    Glue your "frame" on top of your antiqued mirror (I used Gorilla Glue)


    I cut up one of my husband's old belts to use for the strap (looooovin the look of this leather!)


    Add a leather strap to hang (to really "knock off" BD!)


    I found that the leather strap didn't quite hold the weight.

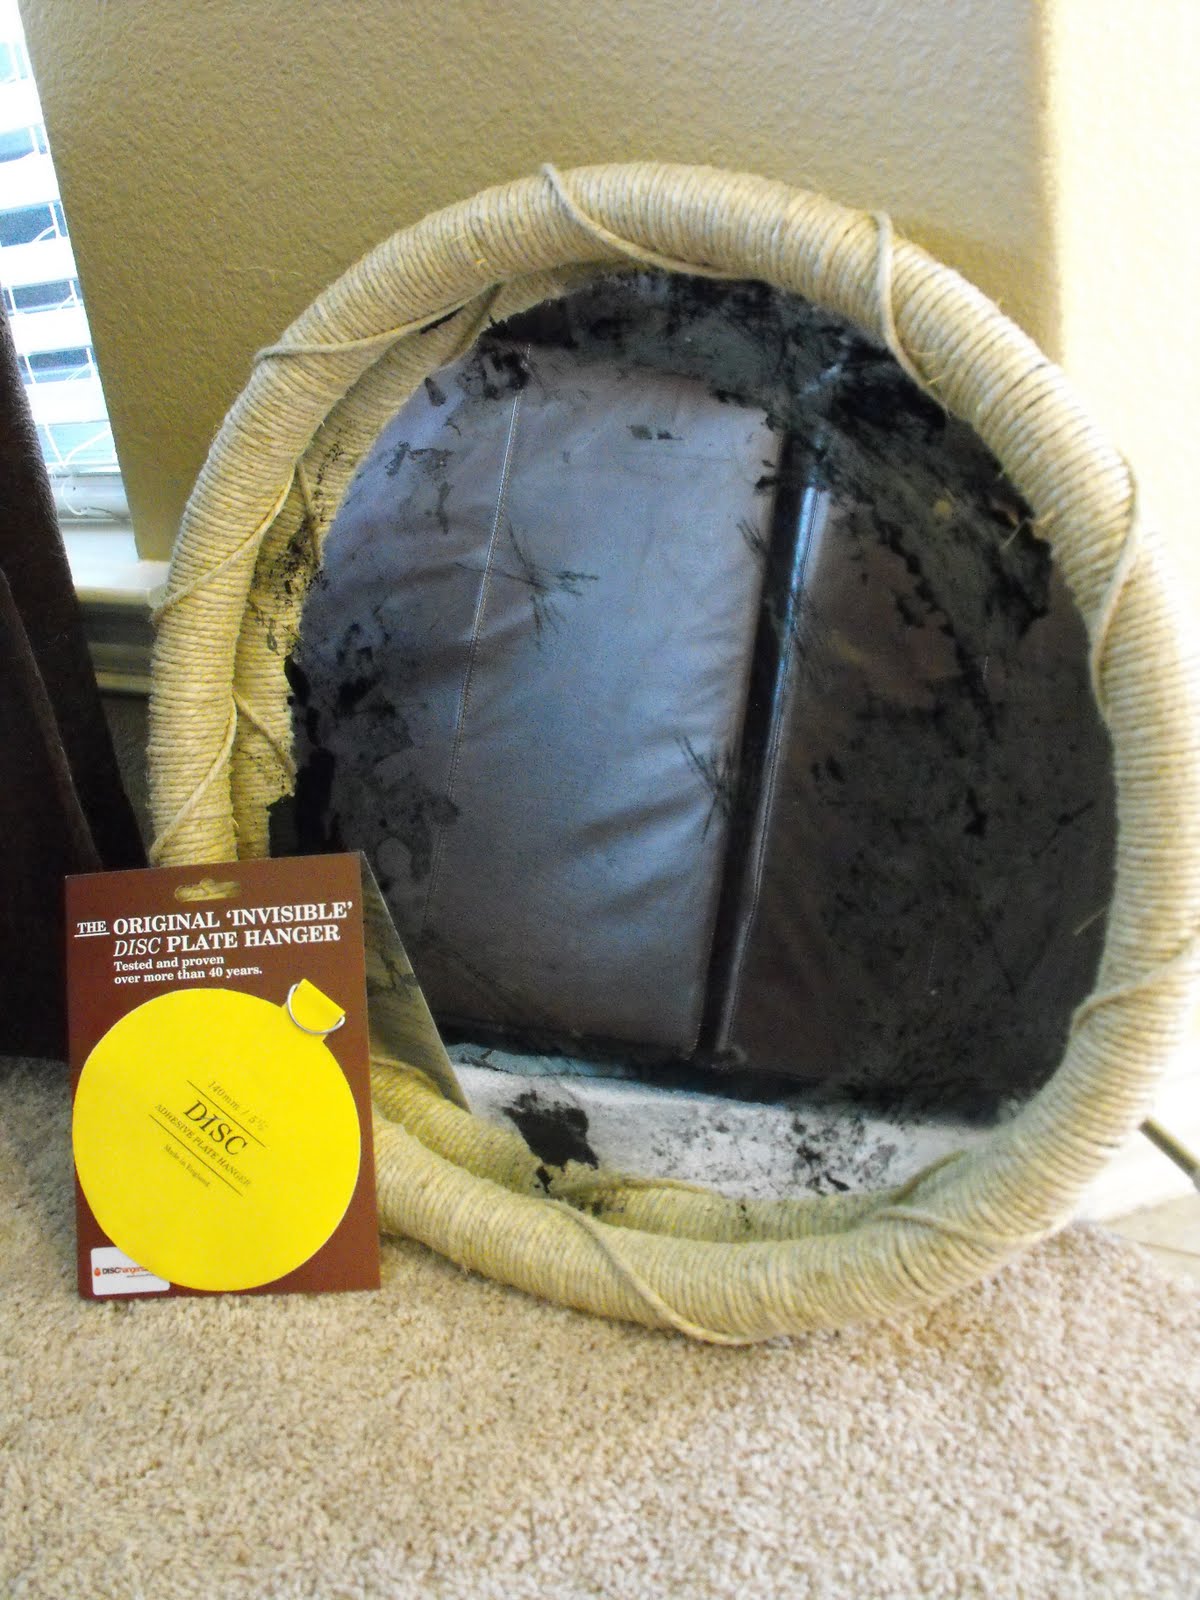
    That's where Disc Hangers come in!

    I peeled off the paper backing and put the adhesive side on my mirror.

    I used the disc hanger to actually hang the mirror.  The leather strap is more for looks than function.  Call me crazy :D


    Hang up and ENJOY!

    Ballard Designs Mirror: $139.00
    Anthropologie Antiqued Mirrors: $695.00
    My {antiqued & awesome} Mirror: $15.50


    Thursday, May 6, 2010

    Welcome Cutting Edge Stencils!

    Pin It

    I am so excited to have Cutting Edge Stencils as a new sponsor!

    They have beautiful stencils. 

    They have Damask, which you know I love!


    They also have a great one called "Songbird" that I think would look awesome over a crib!


    I also really liked this one called Allium:


    Cutting Edge Stencils will be doing a giveaway in the near future, so stay tuned!

    They have a really good How To section on their site, detailing how to stencil.  It doesn't seem that complicated, so go check them out!

    Sunday, May 2, 2010

    Muriatic Acid and Craftiness

    Pin It
    I am guest blogging over at Someday Crafts!

    This site is a great resource if you are looking for inspiration for your next project.

    Instead of telling you what I am guest blogging about, I'll give you some hints...

    It involves Muriatic Acid, was inspired by Ballard Designs & Anthrolpologie, and is something you can do yourself!