Well, I did it again! Miss J's room has been in need of some new window treatments for a while. A very plain window...
First, I found some fabric that I really liked. I made two simple panels, long enough for Miss J's tall windows. (even if you are a sewing newbie, curtains are very easy!!) I was going for simple and kind of Pottery Barn-ish.
Next, I got some PVC Pipe, and cut it to size. I then primed it and spray painted it. I used primer made especially for plastic to prevent scratching.
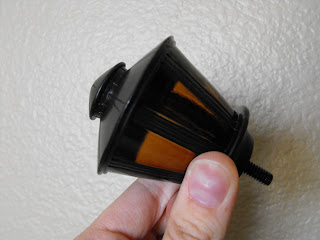
Next, I primed and spray painted some ugly finials I had laying around. Ewww.
They looked muuuuuuch better after some paint!
After I put up the white brackets I bought, I attached my finials. I just use hot glue. It's strong enough to hold it on, and will pop off easily if I ever need to take it down. It's a win win!
I did not like the fact that you could see the hot glue.....
So, I added a thin piece of ribbon to hide it!
Here are some finished shots:
Before:
After:
Project Cost:
Primer/Spray Paint: Free (already had both)
Finials: Free (leftover from previous project)
PVC Pipe: $1.38
Wood Brackets: $9
Total Cost: $10.38
If I could figure out how to go cheaper on the brackets, this project could cost basically nothing!
As always, email me with any questions you might have!
alittleofthis.alittleofthat.blog@gmail.com


So cute! What a great idea.
ReplyDeletei love the difference!! it looks fantastic - and i love the frugal portion of it ...
ReplyDeleteThat looks wonderful!
ReplyDeleteThose look great, I will have to do this sometime - so much cheaper.
ReplyDeleteGreat idea! And I love how cheap it is!
ReplyDeleteGreat idea! I sure I'll be trying this in the future!
ReplyDeleteYou are sweet to add my link. Thank you!!!
ReplyDeleteLove the bargain re-do.
Very cute! I keep thinking I should put up some curtains in my daughter's room... although I guess I should decorate it too if I'm going ot take the time... lol Darn this renting an apartment thing, makes decorating seem so trivial! :)
ReplyDeleteI just want to tell you I LOVE this idea. Cheap compared to expensive wooden rods and no one will ever know! Love it.
ReplyDeleteWhat a creative idea! My husband made me a curtain rod for my patio doors out of electrical conduit because I needed a long and strong rod. He painted it white and added pink glass knobs on the ends to match our room. I love creative people!
ReplyDeleteSherry @ A Happy Valentine
Love it!
ReplyDeleteGREAT way to do cheap rods!
ReplyDeleteOMG I love this idea, and it came out beautifully!! Im totally going to use this in my bedroom! Thanks!!
ReplyDeleteSarah, you continually amaze me with the thrifty projects you do! My sister and I are going to do the magnetic board this weekend from your earlier tutorial. She liked the one I made my mom so much that she wants her very own for her office! Thanks so much for the inspiration!
ReplyDeleteLove it! You are amazing!
ReplyDeleteYou did AWESOME..these look GREAT!
ReplyDeleteDawn @ Mom-a-Logues
http://www.mom-a-logues.blogspot.com
That is so stinking creative and adorable! Thanks for sharing the idea!! Thanks for linking up this week, see you next time :)
ReplyDeleteHeyy! I'm a new follower from Sassy Sites! I hope you get a chance to come check out my blog!
ReplyDeletehttp://yourworkistodiscoveryourworld.blogspot.com/
Great Idea, love it! I'm your newest follower.
ReplyDeleteGorgeous!! Love this idea!!
ReplyDeleteGreat idea! Love how it turned out!
ReplyDeleteOMG!!!!! What a good idea you had. I couldn't tell the difference! They look like wooden rods. I'm getting ready to move into the house I just bought and was wondering what to do, this is it. I can stop worrying now about it. Problem solved. The little one's looks beautiful, love the ribbon on the finials, necessity is the mother of invention. Thank you so much, Jude
ReplyDelete