Thursday, August 26, 2010

Powder Room Reveal {Part 2}

Pin It
I recently renovated our powder room.  If you missed the post, check it out here!

Just a quick recap of what it looked like before and after:

Before


After:


Alrighty.....that's the simple steps of what I did.  I'm going to go number by number and give you tips, tricks, and how-to's!

Painting the Room
I only painted the room 3/4 of the way down because I knew I would be wallpapering below.  Save yourself some time!

TIP: Buy GOOD paint.  This will save you so much time and effort.  Cheaper paint doesn't cover as well, and you wind up doing more than one coat.  I have never had to paint more than one coat with the Valspar paint from Lowe's.  It's worth the extra money!


Light Fixture

  • If you've never installed a new light fixture, try it!  It is SOOOO easy!
  • Turn off the power to the room @ the breaker box-very important
  • Unscrew the old light bulbs, and take down the old fixture.  This is a figure it out step.  Every fixture is a little different to take down.
  • Match the wires for the new fixture to the wires coming out of your wall.  Black to black, white to white, and ground to ground.
  • After matching your wires, wrap them in electrical tape, or use the little caps that come with most fixtures to secure them together.
  • Install the new fixture using the directions.
  • Mine went from this to this:

Bead board Wallpaper
    • I bought pre-pasted wallpaper that is paintable.
    • I did not use extra paste.  
    • I simply measured 36 inches (that's how tall I wanted mine; you can do any height you like), and cut the wallpaper.
    • I then dipped the cut length in water. 
    • I let it sit in the tub of water for 30 seconds or so, and then I pressed it on to the wall.  
    • I used a smoothing tool (made for wallpapering) to smooth out any air bubbles.  
    • Work from top to bottom!  Have paper towels handy to clean up the paste that oozes out the bottom.  You will get ooze!
    • Measure your next length, dip it in water, and press it on to the wall.  Very easy!!!
    • I think it looks pretty dang good for wallpaper.


Chair Rail
 
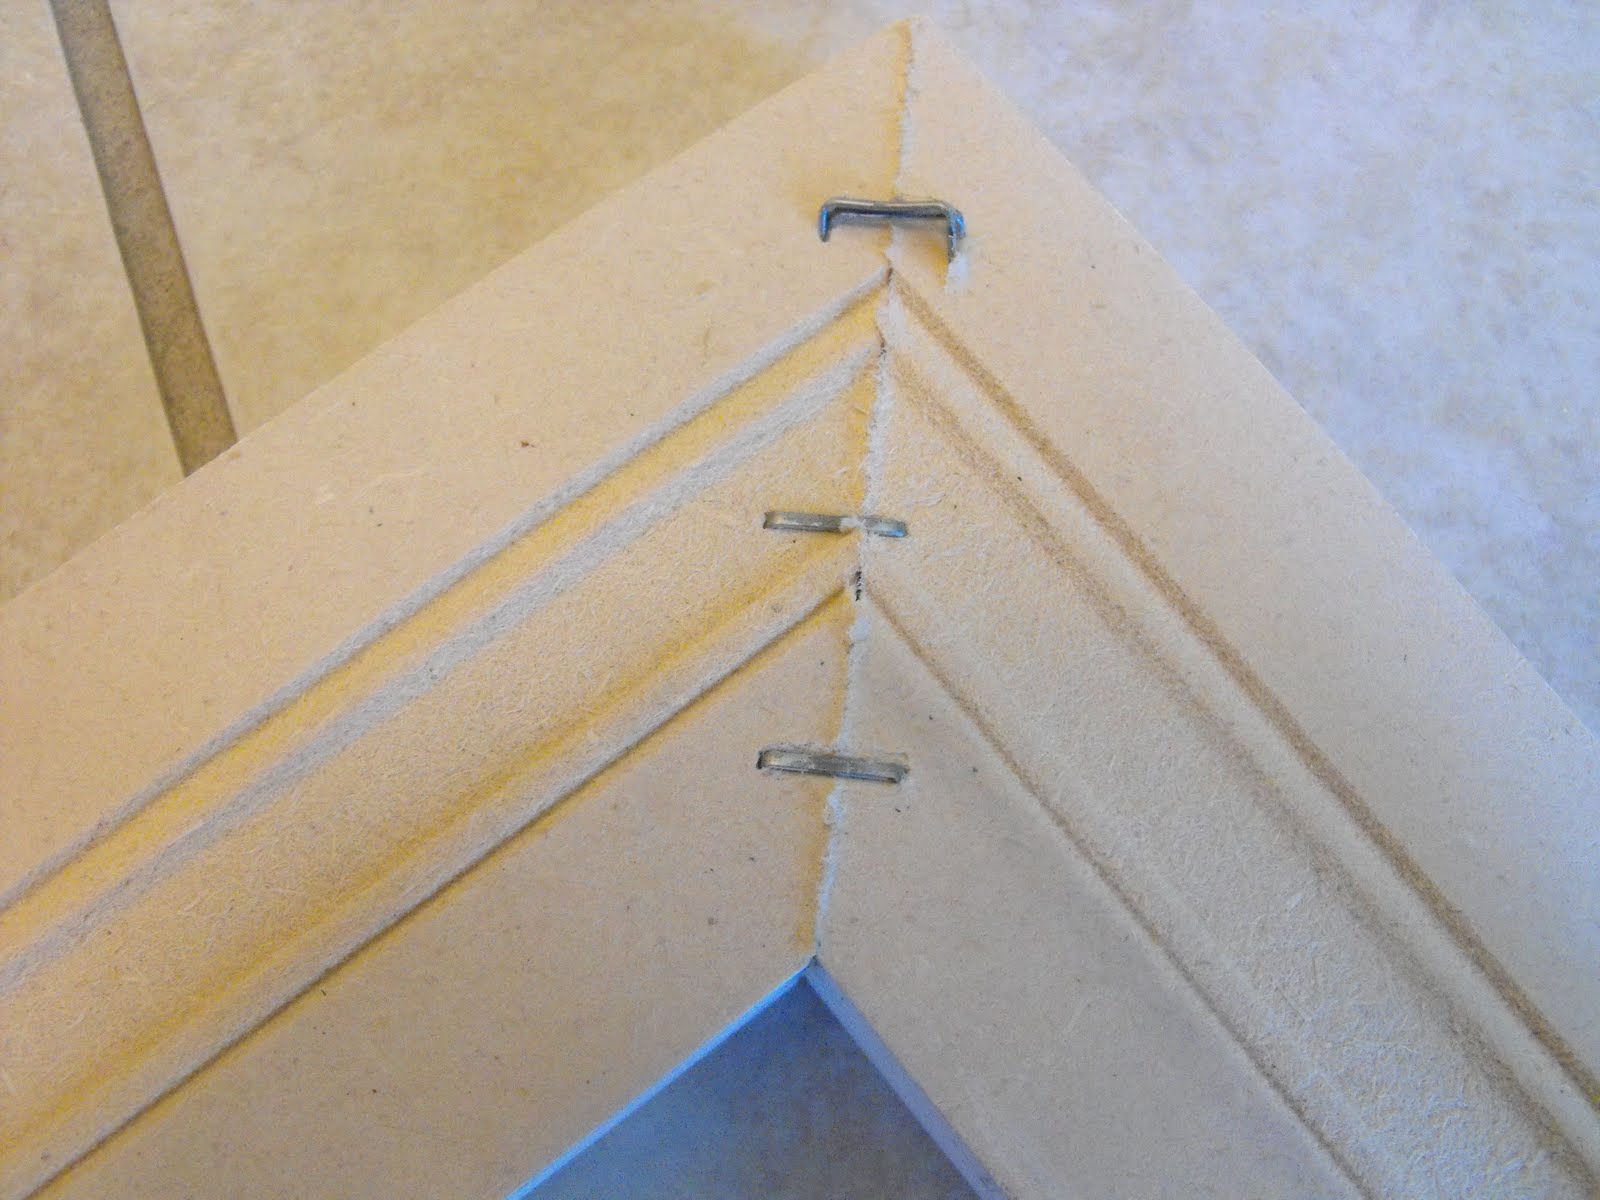
The chair rail trim I used is technically window casing.  I loved how thick it was. (Mine is 3.5 inches tall)  I also thought that traditional chair rail stuck out from the wall too far.  If you want to do a chair rail in a room, pick out trim you like! It doesn't really matter if it's chair rail trim or not; chances are it will look good, and no one will ever know!  I don't think you would know mine was really window casing :)

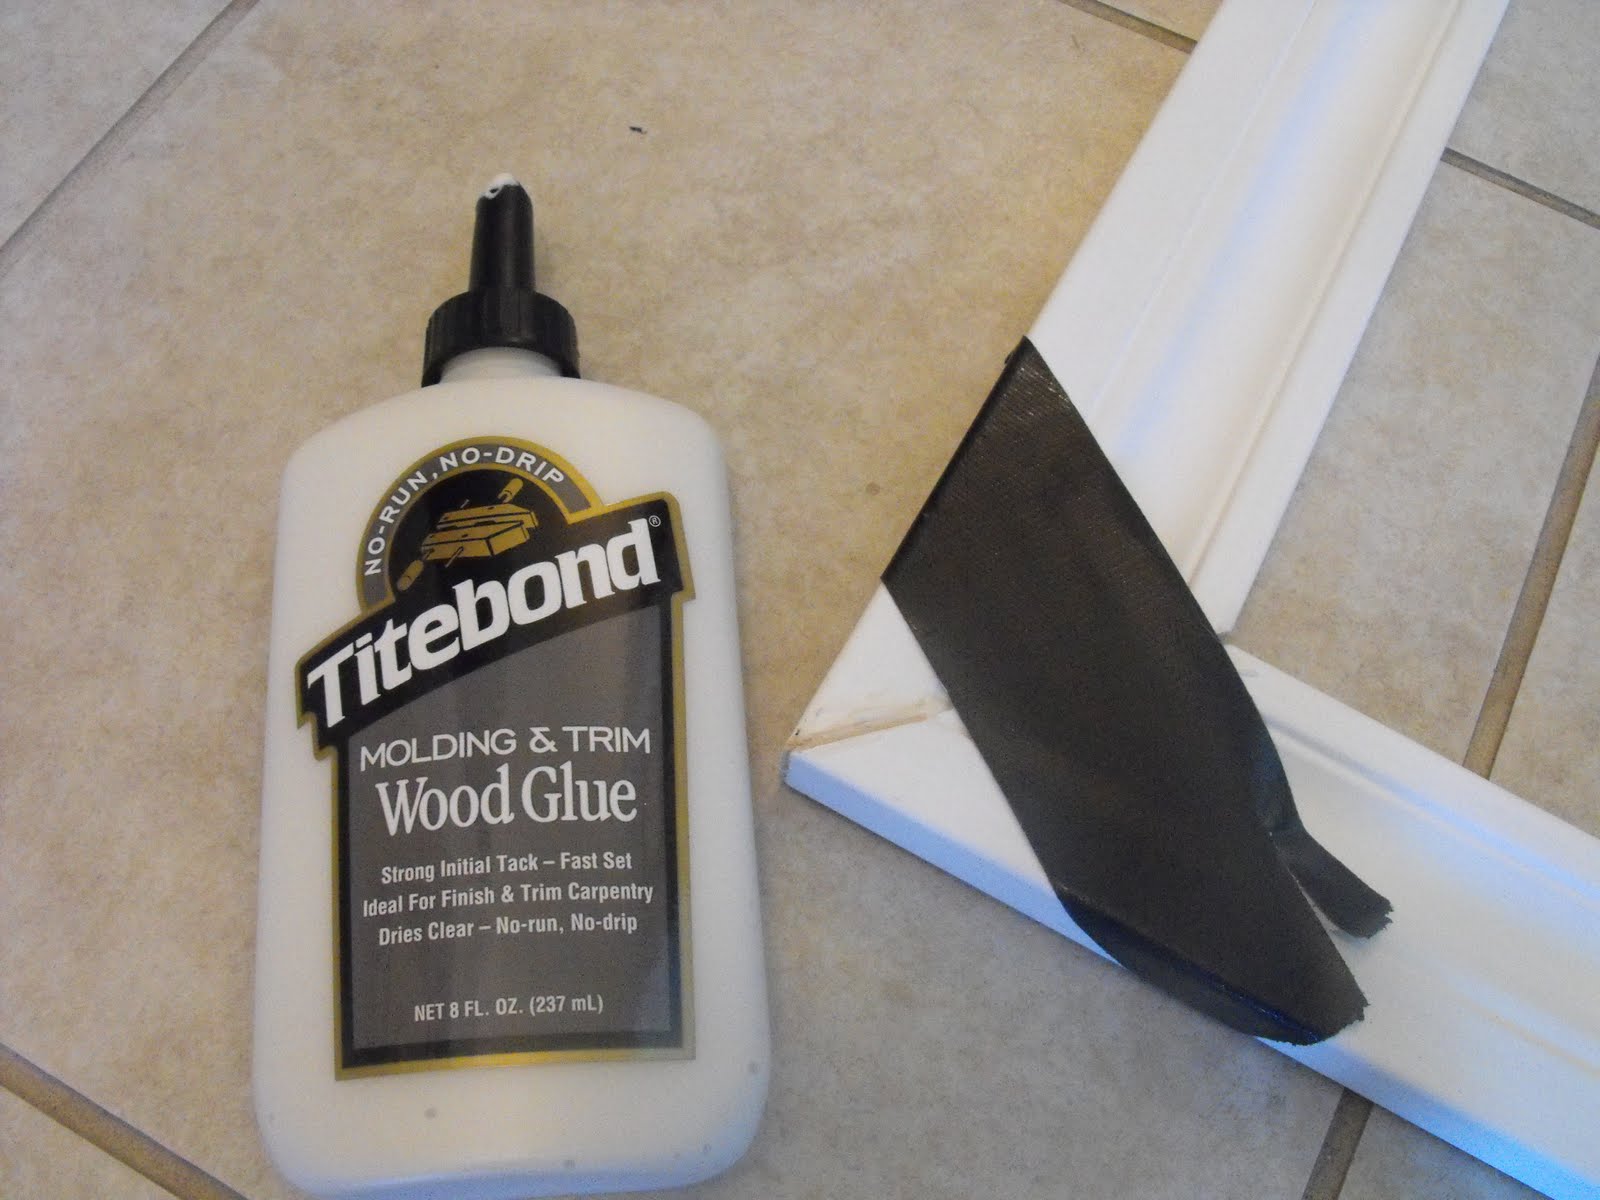
After measuring and cutting the trim, I held it up to the wall where I wanted it and leveled it. Make sure you level!  You don't want it all wonky looking!  After leveling it, I attached it to the wall with liquid nails, and used the nail gun in a few places. (in the pics below you can see the nail holes, and where all the seams don't line up yet)


Baseboard Trim
Because I have an inability to cut in a straight line was in a hurry, some of my wall paper was uneven, and didn't sit flush with the baseboards.  Also, I'm a "do it as fast as possible" person, and didn't take the time to make sure I cut even.   Sooooo, I bought some inexpensive trim to cover up the wallpaper's unevenness at the bottom and make my baseboard taller, all at the same time!  Genius, right?


I don't remember exactly what type of trim it was; just some I thought would look nice on top of my existing baseboards.  It was about 1.5 inches tall.  I measured the trim and cut it.  I again pre-painted it.  I  then attached it to the walls with liquid nails, and used the nail gun in a few places.  No need to level this step.  The baseboards were already there, so I just put the new trim right on top.

Caulk

This stuff is my new BFF.  Seriously, it's amazing!!  It covers so many flaws. 
  • I used a cheap caulk gun from Lowe's.  

  • I used LATEX caulk.  The cheapest they had.  The cheap kind is just as good as the expensive stuff.
  • Latex caulk is paintable, so once it dries, you can paint it to match your trim.
  • Caulk along the top and bottom of any trim that you add.  Also, caulk in the corners where your trim meets.
  • To get professional looking lines when caulking, use painter's tape.
  • Tape a little above where you are going to caulk

  • Using your caulk gun, run a thin bead of caulk along the edge of the tape.  Smooth with your finger!  It will look messy.

  • Immediately remove the tape.  Don't let the caulk dry!  The tape will pull off all the caulk if it dries.

  • Look at how SMOOTH those caulk lines look!

  • Reapeat this until you have caulked the top of the trim, and the corners where the trim meets up.


Mirror

I used an oval mirror we already had.  It was brown to begin.


  • I love the details; I thought they looked really feminine!

  • I carefully taped off the mirror part, and gave it a primer coat.


  • After the primer coat, I used Krylon (Ivory) spray paint.  2 or 3 coats; I was careful to get in all the cracks and "swirlies".


Trash Can and Hand Towel

  • Using an existing flower pot, I spray painted it, and hot glued on some pink ribbon.

  • I bought a white hand towel, and used fabric glue to attach the pink ribbon.  Should be fine as long as I hand wash the towel....

Toilet Paper

  • The basket I used is actually a bread basket from Target.  It is the perfect size for three rolls of TP!  And, it was on clearance; awesome! 


Well, that's all I can think of!  E-mail me at alittleofthis.alittleofthat.blog@gmail.com with any questions! 

Saturday, August 21, 2010

{Cutting Edge Stencils} GIVEAWAY!

Pin It
Who doesn't LOOOOVE a Giveaway??!


Cutting Edge Stencils will be giving away $40 to spend in their online store! AND, they will ship the winner's order for FREE! Sweet!

Here are a few of their awesome products!


Isn't that a COOL stencil?


 Of course I love the damask stencils
(they have lots of different kinds of damask!)


Here are your SEVEN ways to Win!

**Leave your E-mail address in your comment so I can contact you**
  • Become a follower of A Little of This, a Little of That (leave a comment telling me you now follow)
    • if you are ALREADY an awesome follower, leave me a comment telling me so!
  • SUBSCRIBE via e-mail or reader to A Little of This, a Little of That **look at the right side of my blog, beneath the sponsors section** (leave a comment telling me you subscribe!!)
  • Go to Cutting Edge Stencils and tell me what you would spend your $40 on! (and come back and tell me in a comment)
  • "Like" Cutting Edge Stencils on Facebook **click here** (leave a comment telling me you "liked" them)
  • Tweet about this giveaway (leave a comment with the link)
  • Blog about this giveaway (leave a comment with your blog link)
  • Facebook about this giveaway (leave a comment w/a link to your post)
Good Luck!  Giveaway ends August 29th!

    Monday, August 16, 2010

    Powder Room Reveal!

    Pin It
    We've lived in our house 3 years, and I've completely ignored our powder room (1/2 bath).  I'm not sure why since I use it a gazilion times a day!  Just one of those projects that got put off.

    Well, I got a bee in my bonnet to fix it up!  I knew I wanted....beadboard.  Ahhh!  So lovely and fresh looking!  I was thinking something like this:


    I started researching tutorials online on how to install beadboard, and I realized  I might be getting in over my head.  Especially when I read on several sites that they recommend removing all plumbing fixtures first (AKA the toilet and sink).  Ummmm. Not gonna happen.  Wayyyy too much work for me!

    That's when I stumbled on THIS amazing blog.  She used beadboard wallpaper to mimic the look of beadboard for a FRACTION of the effort, and a fraction of the cost.

    I'm sure tons of you already know about beadboard wallpaper, but it was a revelation to me!!

    Off to Lowe's I happily went to buy myself some faux beadboard.


    BEFORE:


    And my personal favorite, the "Hollywood" lighting.  Ughh!  Classy, right?


    I won't bore you with the details of how we did our re-do.  That will be a seperate post, so look for it!

    AFTER:


    Here are some close ups of the "beadboard" and the chair rail:
    It looks prettttty close to real beaboard!


    Here are the baseboards that I "chunked" up.  Lovely!


    New Light Fixture:


    Here's our new trashcan:
    (a flower pot I spray painted!!)


    I am LOVING my new space!


    ~Linking up to these great parties~

    Monday, August 9, 2010

    Crown Moulding--You CAN do it!

    Pin It
    I'm excited to show you my latest endeavor: Crown Moulding!

    The thought of doing this myself has had me scared silly for the last few weeks.

    There was nothing to be worried about!  It was SO EASY to do!


    My husband and I did it ourselves, and it took about 4 hours total.  We had a hand saw and miter box, and not much of a clue about what we were doing.  If we can do it, so can you!


    Before:


    After:


    Some close ups of the Crown Moulding:


    TIPS and Tricks for DIY Crown Moulding:

    • Don't be afraid to tackle this yourself; it's EASY!
    • Buy pre-primed moulding.
    • Paint your moulding BEFORE you install it.
    • Use the inner and outer corner "cheat pieces" to save you from having to miter the corners.
    • Don't think you need a big power saw for this; we used a hand saw and miter box.
    • Measure twice, cut once!
    • Use Liquid Nails to hold it in place initially, and then use nails (we used a nail gun, but you can do it by hand too)
    • Use LATEX caulk to finish the edges.  Latex is paintable, silicone caulk is not.
    • Caulking can be messy; use a wet paper towel to wipe any drips and to wipe your fingers as you go!
    The BEST part of this project?  It was CHEAP!! 

    Two 16 ft Crown Moulding pieces = $40
    Two 12ft Crown Moulding pieces = $30
    Four Inside Corner "cheat pieces" =$30
    Latex Caulk = $1.40
    Caulk Gun = $6
    Paint = $25 (I have TONS left for more projects!)


    Total Cost: $132.40


    Some resources on the web I found helpful:

        Thursday, August 5, 2010

        Doormat Wall Art Update {DIY Frame}

        Pin It
        Sinus surgery. Uggghhh!  That's what I've been doing the last few weeks.  Good news is that it's over, and I'm feeling much better.  I have reaffirmed the fact that I am not a fan of surgery, nor am I very good at the recovery part.  You know, the part where you are supposed to take it easy? Nope, I'm not very good at that!


        One of my first blog posts was how to use a doormat to create wall art.  You can find it here.  The finished product was this:


        I love this wall art!  So easy and cheap to make.  However, I felt it looked a little.......unfinished.  It's been driving me crazy for months!  So, I decided to "frame" it.


        Supplies Needed for a {DIY} Frame:


        Pre Primed Crown Molding (several aisles of it @ my local Lowe's.  Just get a thickness and type you like.  Any kind will do)
        Miter Box and Saw
        Wood Glue
        Staple Gun
        Liquid Nails (Gorilla glue would work too)
        Gorilla Tape (any strong tape will work)


        How to make your own frame, from scratch!

        • Measure the object you want to frame.  For example, if your picture/art is 12 inches long, you will want to cut the molding to be a little shorter than that. You want to leave an edge to attach your picture to the frame when finished. (like this)
        • Use your miter box and saw to cut the molding at 45 degree angles (There are angle guides on the miter box to help)

        • My art was a square, so I cut all my pieces the same length.  If you art is not perfectly square, measure one side, and cut the opposite side to the same length.  (here's mine with all four sides cut)

        • To give your frame extra durability, line up your corners and staple them on the back of your frame.  Like so:

        •  Repeat this for all four sides

        • Flip your frame over, and add some wood glue to the front to "seal" the edges nice and tight.  You will need to clamp together your corners for a few hours to let the glue dry.  Gorilla tape is GREAT for this!


        • Once your edges are dry, you can lightly sand away any excess glue that dried.

        • Next, spray paint your frames the color of your choice (they are already primed if you buy the pre-primed molding)
        •  TIP: If you ever buy Valspar spray paint (from Lowe's) and wonder what the color is called, look on the label. (took me forever to figure this out!!!)
        •  Once your frames are nice and dry (give them several light coats, allowing them to dry in between), you are ready to "frame" your picture/art!

        • On the back side of your frame, use a thin line of Liquid Nails.  Attach your art and let dry for 6-10 hours.  
        •  NOTE: Liquid Nails is SUPER strong, so that's why I chose it.  My art is made of plywood, so it needed something really strong.


        • Here are some finished shots:

        •  Here they are in our piano room


        • Before
        •  After