Showing posts sorted by relevance for query living room. Sort by date Show all posts

Sunday, May 19, 2013

Living Room {Tour}

Pin It
I showed you our new dining room here, and our girls' room here.


Today, I'm showing you our new downstairs Living Room.  We really love this space!


Love these fun seagrass chairs!  They are actually pretty comfy.


The couches are THE BEST.


Do not let the white color worry you.  These slip covered sofas are fully washable, and they are holding up awesome so far!  I have successfully washed out dark melted chocolate, blue ink pen, spilled juice, and grease.  BEST investment I've ever made!


Close up of the different pillows:


I'm also loving this ottoman in the middle of the living room.  It's nice and soft on all sides; perfect for my three little ones running around!


Are the feet cute?!


To give you an idea of how awesome the drapes turned out, here is a shot of them from the 2nd floor.  They are 19 feet long, and I made them.  
Whew-that was a project!

(excuse the crummy picture...it's not easy to take a picture of windows!)


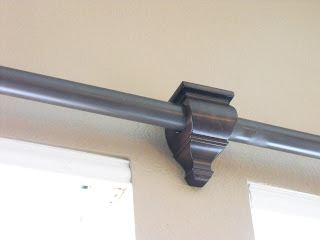
The hardware I used at the top of our window treatments are galvanized pipes, from the plumbing section at Lowe's.  Cheap and easy.


The best seat in the room.....when my kiddos let me have a moment to play!


Thanks for stopping by and checking out our new living room!


Friday, March 4, 2011

Big Boy Room {Finished!}

Pin It
I LOVE the feeling of finishing a project.  Especially a big project!  

I showed you here how the Board & Batten turned out in Mr. A's room.


I showed you here all the tips and tricks I could think of for tackling B&B yourself!


So, do you want to see his FINISHED room?!


Lots of pictures to follow, and a list of where I found all his stuff at the bottom of the post.


Storage System

I was SHOCKED by how much stuff this system can hold!  It handles all the toys from my living room, all of Mr. A's books, and MUCH more.


The best part?  The chalkboard doors.  Mr. A looooooves them!


He also loves his little chalk pail:


I showed you in this post how I used vinyl to number his bins.  
I really like the way they look!


Bed

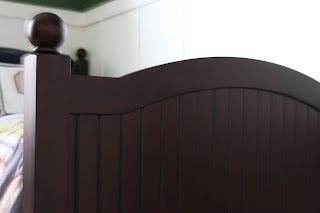
I love his bed!  We also sprung for the guard rail that matches it.....it looks so much nicer than the ghetto metal one I had on Miss J's bed!

Close up of the details:

Nice and boyish, right?


Bedding

Mr. A is, of his own choosing, all about basketball. 

I wanted to do a sports theme in his room without it screaming SPORTS!!


This quilt is a great weight.  Not too heavy, and it feels really well made.  He loves all the balls on it.


Above the Bed

Mr. A's only request for the whole room was a "hoop".  

So, I found him a pretty darn cute one! 

(it has chalkboard score boxes on both sides....love it!)
I customized it with his name and my trusty Cricut.  Wish I could show you the whole name; it's so cute!  

(you'll just have to wonder what Mr. A's real identity is.....)


His favorite past time is standing on his bed and shooting hoops :)


Extra Storage

If the storage wall wasn't enough, I found this FAB ball bin for Mr. A's bigger balls and stuff.

It's super tall, which is a plus.  Also, it breaks up all the wood in the room.  I like the metal.


Hubby's input

  Of course my hubby had input in our only son's room.  

He found this big vinyl decal and insisted that I find I place for it.  I was NOT sold on it at first, but I really like it now!


Close up:


Finishing Touches
My biggest hold up in the room was what do on the looong wall above the bed.  

I didn't want something giant up there, and we already had vinyl up on the wall that faced the bed.  Hmmmmm.

Where else would I find what I need than at Costco! (love that store)

They were running a special on their photo canvas.  $10 off each canvas; that is a deal!

I decided to do 3 canvases, and it took up the whole wall:


This is my favorite of the pictures:


I think that's it.  Hope you enjoyed the "tour"!


Where I found Mr.A's stuff

Storage Wall System - Pottery Barn Kids
Bed & Bedding - Pottery Barn Kids
Tall Wire Ball Bin - Land of Nod
Oversized Basketball Player vinyl decal - Empire City Studios (etsy)
Black & White Photo Canvas - Costco
Numbered Storage Bins: Lowes (customized by me)
Basketball hoop: Pottery Barn Kids (customized by me)
Galvanized Chalk Pail - Target (dollar bins)

TIP: The pieces I bought at PBK were ALL on sale.  January is their "storage sale" month (only ONCE a year), and they really mark down alot of their furniture.  I would recommend buying their storage system in January, when it's on sale.
The bed and bedding were also on sale too....sale prices beat full price!

Monday, March 1, 2010

PVC Pipe Curtain Rods

Pin It

I have been facing a dilemma since we moved into our house. We have 6 windows in our living room, which I love! The amount of natural light is great. I
'm fairly addicted to natural light. I cannot stand a dark house. Who cares if my energy bill would be a little less each month if I closed my blinds? I NEED LIGHT!

Back to my dilemma. The window walls are so long that
it would cost a fortune to install drapery rods. Each wall is 10+ feet long. That = major money for drapery rods! I had to get creative....
Also, our windows meet in a corner, so that makes it more complicated. See the picture below.
I saw a show on HGTV that used PVC pipe for drapery rods in a room with a really long wall. That is what I would do!

Here is the price break down on PVC pipe versus regular curtain rods.
This price is what it would cost me to do 20+ feet of wall space.

1 3/8" Drapery Rods = $77.94 (from Lowes)
1 3/8" Drapery Rods = $150.00 (Bed Bath and Beyond)
1 3/8" Drapery Rods = $159.98 (Amazon.com)

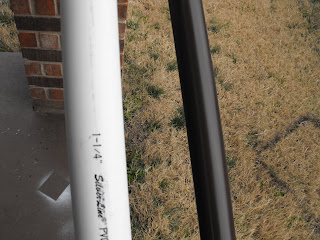
or 1 1/4" PVC Pipe = $9.09

Holy Money Saver! So, PVC Pipe it was.

I went ahea
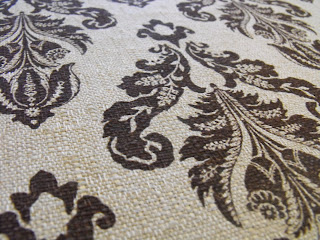
d and bought wood finials, brackets, and sconces to go with the PVC Pipe. I am in love with them. Wait....can you love something that won't love you back?? I then found some spray paint that would match the finials/sconces. I gave the PVC pipe a few coats of Valspar Velvet Brown. I realized that the PVC looked too 'matte' after the spray paint, so I also did a few coats of a clear Gloss. Can you see the difference? Wow. They are looking pretty niiiice. Would you guess they were PVC pipe? Now, the installation. What a pain. It wasn't hard, just took a while. First I installed the brackets and sconces. I then CAREFULLY slid in the PVC pipe. Your pvc pipe WILL scratch if you aren't careful. I did a few 'touch ups' on mine after installing it. See my scratch?? I then slid on my curtains....... I want to take a break from my 'PVC' post and talk about the curtains. I am in LOVE with the fabric! I looked everywhere for drapes, and couldn't find anything even close to what I wanted. So, I broke down and decided to make them myself. How to actually make them will be another post entirely. I did make them (it took 2 weeks!!!) and I think they turned out pretty sweet. I used a chocolate and cream damask, with a wide chocolate band at the bottom, and some cording in between the two fabrics. What I love the most about this fabric is the 'burlap' look them have. It makes the fabric way less formal looking. Now, back to our reguarly scheduled post..... I hot glued the finials onto the end. Here are some finished shots. I think it looks pretty fab!

Just to recap:

BEFORE (like, before we moved in....)


AFTER
I'm Linking up over at Room to Inspire and Shanty 2 Chic and Domestically Speaking